
Redlining contracts can be frustrating when you don’t know how to use MS Word’s Track Changes features to your advantage. According to a recent poll, 91% of contract negotiators (myself included) use Microsoft Word to redline contracts. But no one ever taught us how to leverage MS Word for more efficient contract reviews, redlines, and negotiations. Until now!
In this article, I’m going to show you how to master MS Word’s Track Changes features which will lead to faster contract reviews, less back-and-forth, more enjoyment of your work, and greater negotiation leverage.
My name is Nada Alnajafi. I’m a seasoned in-house attorney, blogger, author, and speaker who loves working with, talking about, and writing about contracts. And I’m determined to transform the way us lawyers and contracts professionals redline contracts for the better.
If you’re interested in learning more about contracts, follow me on LinkedIn and check out my book Contract Redlining Etiquette and my blog Contract Nerds.
The Problem with Metadata
Metadata is a set of data that describes and gives information about other data.
For documents, that means data that gives information about a document. Kind of like a fingerprint. The problem with document metadata is that it might contain information that is confidential, sensitive, or even attorney-client privileged. Because contracts are iterative documents that often borrow from or build on other templates, contracts professionals should be cautious about this and consider scrubbing their contract templates and document drafts to avoid inadvertently disclosing this type of information.
Here are some examples of metadata that might be captured in a contract template or draft that you may be classified as confidential or otherwise sensitive information.
- Your name and initials;
- Your email address;
- Your company or organization’s name;
- Other file properties and summary information, such as file size, date/time the file was created, modified and accessed and the location where the file is stored;
- The names of previous document authors;
- Document revisions and versions dating back years;
- Template information: determines the basic structure for a document and contains document settings such as fonts, macros, page layout, special formatting, and styles;
- Hidden text: text that is visible to search engines but invisible to humans. It is mainly accomplished by using text in the same color as the background color of the page. It is primarily used for the purpose of including extra keywords in the page without distorting the aesthetics of the page;
- Macros: mini-programs that will execute a series of commands in series, saving the user having to repeat typing or data input. Macros are typically created to perform frequently used tasks; and
- Hyperlinks.
This article by Microsoft goes into further detail about the types of metadata captured by the different Microsoft 365 documents.
How to Remove Metadata
1. Go to File > Info > Check for Issues > Inspect Document.
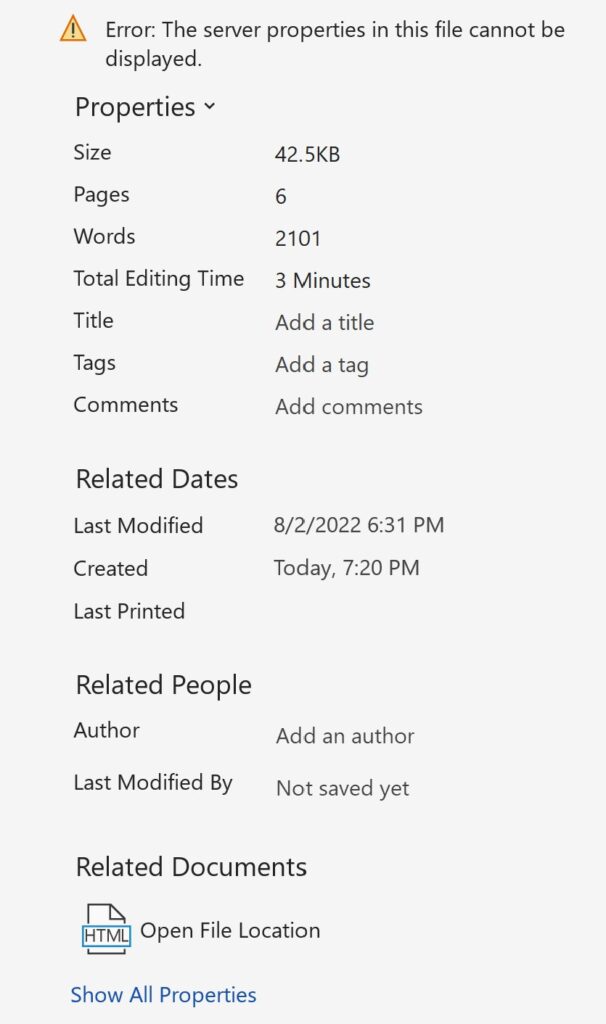
On the right side of the screen, you can see a preview of the document Properties which may point out some unwanted metadata. For example, I’m not sure who Spencer Building Maintenance is but he is listed as the author of this particular contract template.
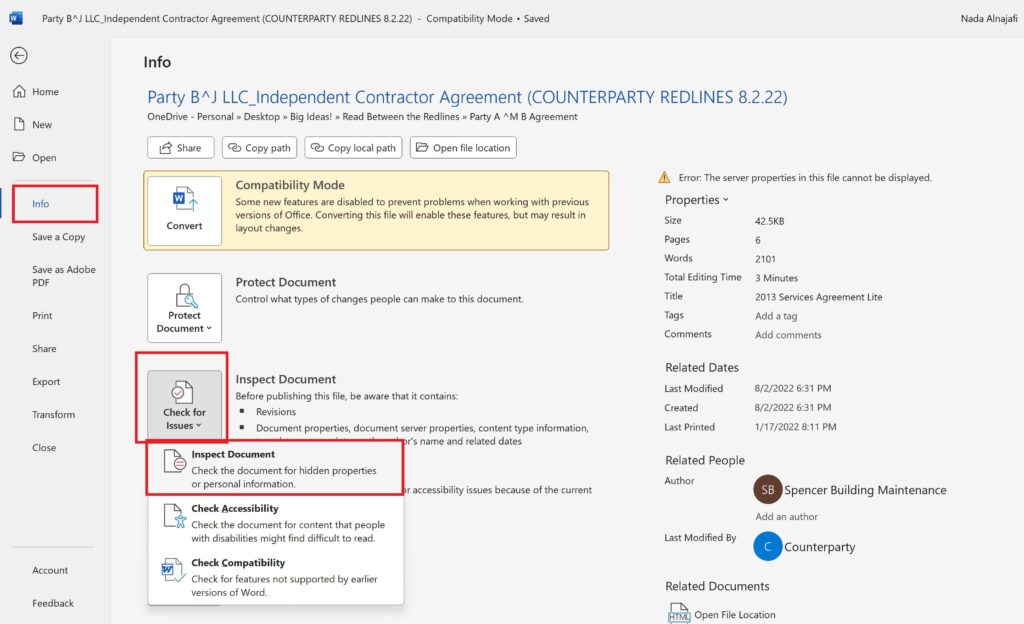
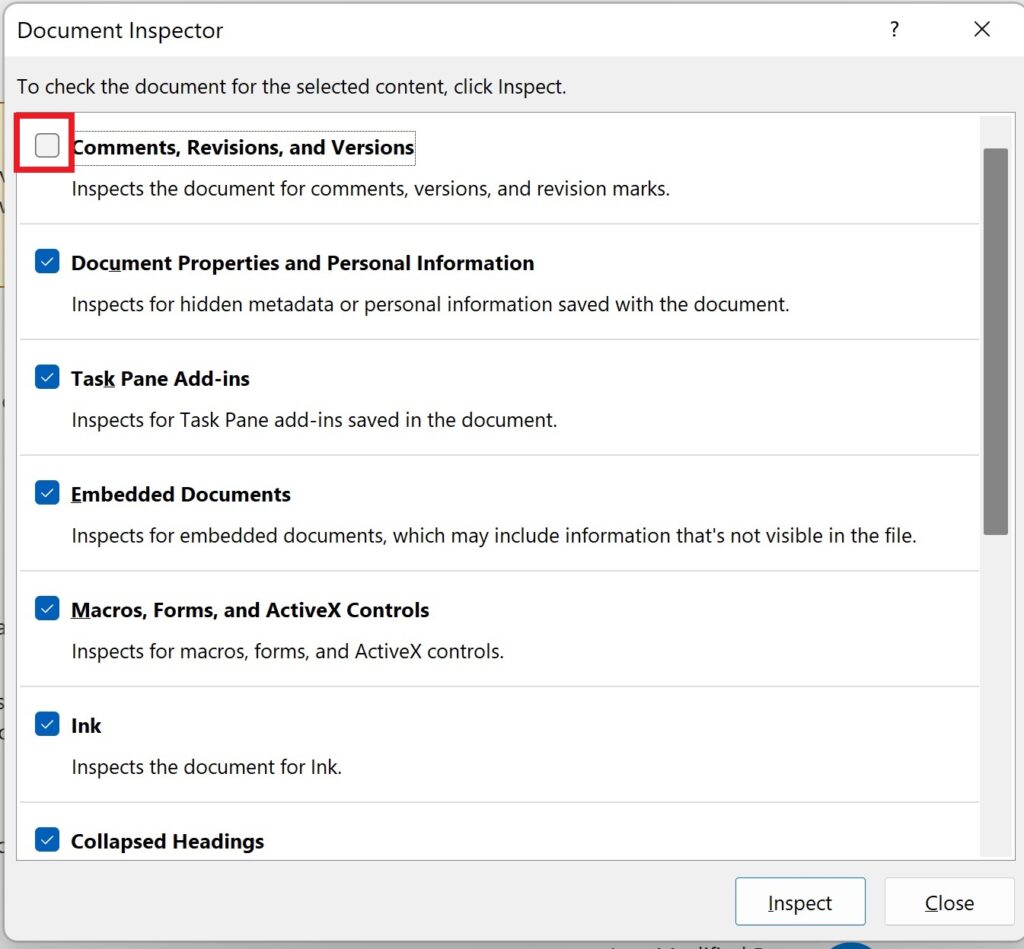
2. In the Document Inspector box, you will be presented with 11 different categories of items that Word will inspect for you. Check the boxes of the categories you want to clear.
Note: If the contract is already redlined, then I recommend unchecking the “Comments, Revisions, and Versions” category, as show in the image below. For M&A transactions that use footers like comments, I recommend unchecking “Headers, Footers, and Watermarks” as well.
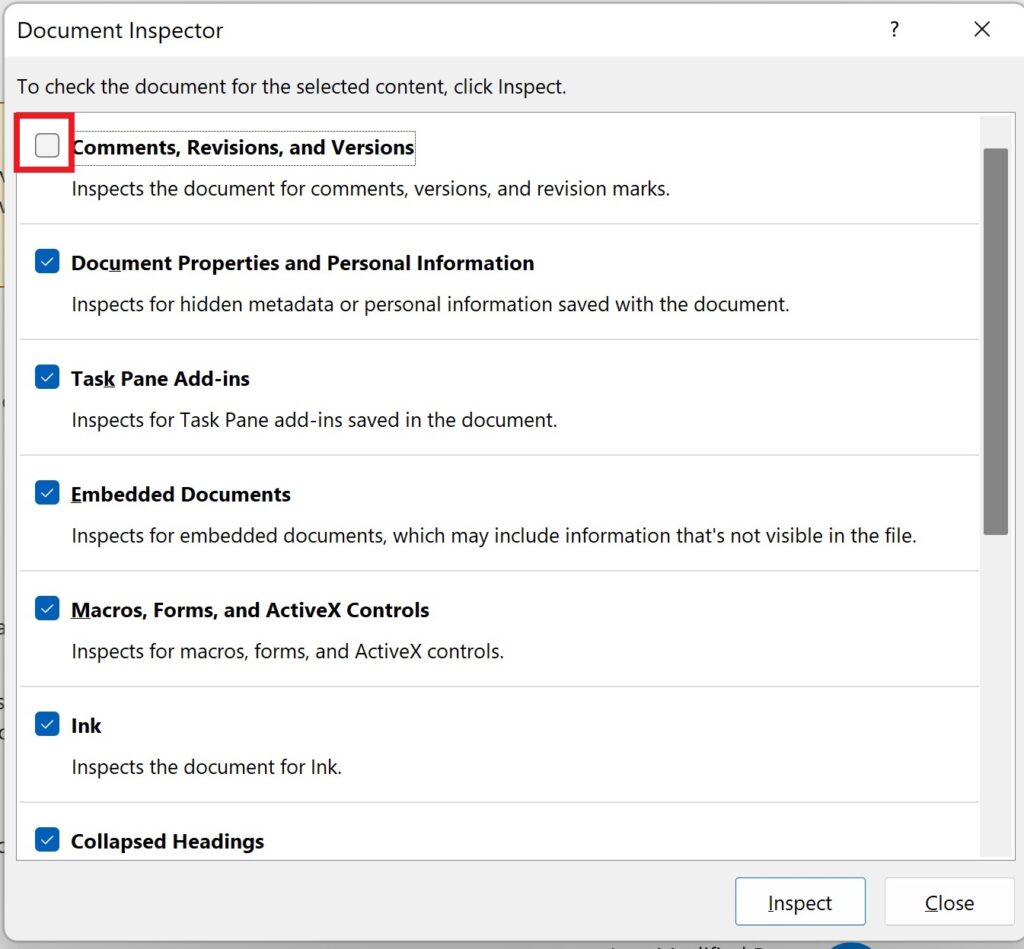
3. Then click “Inspect.”
4. The Document Inspector will run for a few seconds and then present a results screen. Review the results from each category and determine which ones you want to remove.
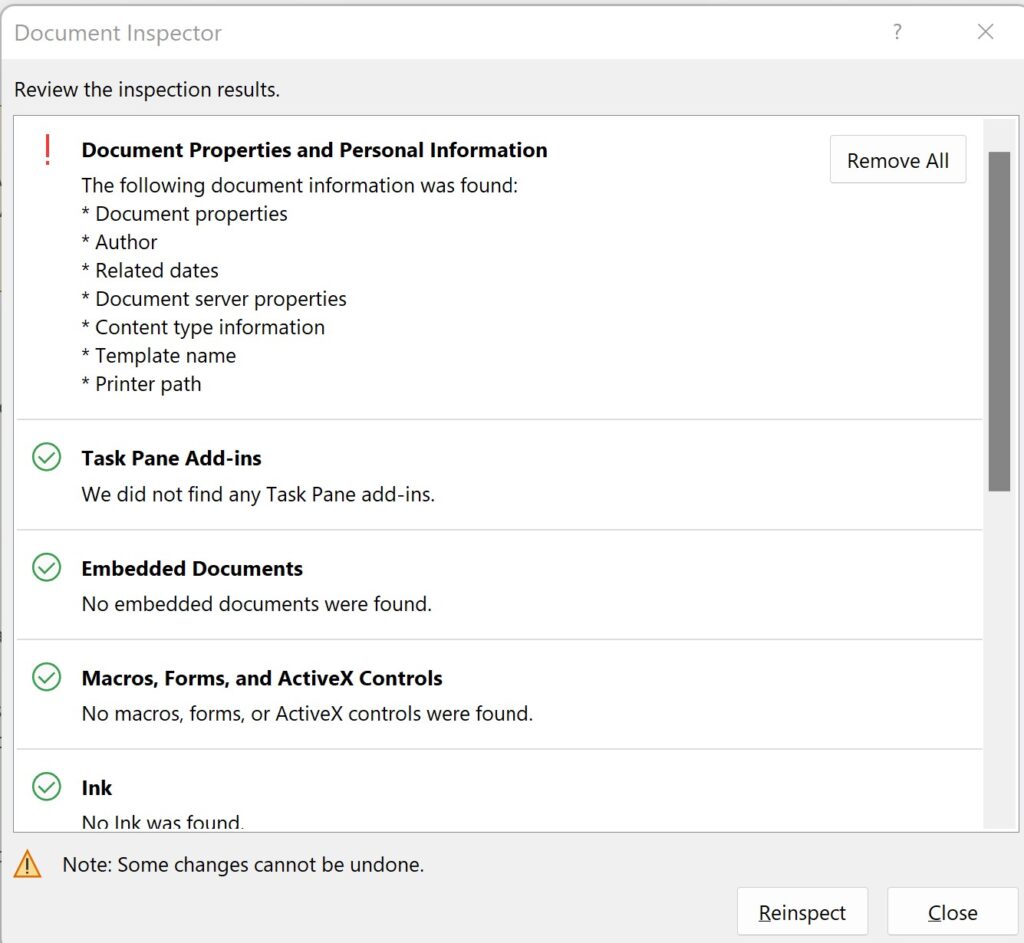
5. Click on the “Remove All” button next to the categories you wish to clear the metadata from.
6. Click on “Reinspect” if you want to be double sure that everything was cleared as intended.
Note: In my examples, I clicked “Remove All” from the Document Properties and Personal Information category. Then I checked the document properties and saw that Spencer Building Maintenance was no longer listed as the author.
Interested in speeding up your redlining process? Check out our Read Between the Redlines column for more tips, tricks, and workarounds for redlining contracts using MS Word.


